In this example a new Custom Column, [Full Name], will be created based on two existing Model Attributes, [First Name] and [Last Name] separated by a space.
Tip: The list of Custom Column PQL functions includes CONCAT(<string1>,<string2>), which is useful for joining two strings together. In this example, we need to join three strings (first name, last name, and a space between them) so we will use the "+" operator.
Step-by-step example
Before you begin
You need to open Formulate and then open the Custom Column editor. For more information, see Custom Column Examples.
Step 1
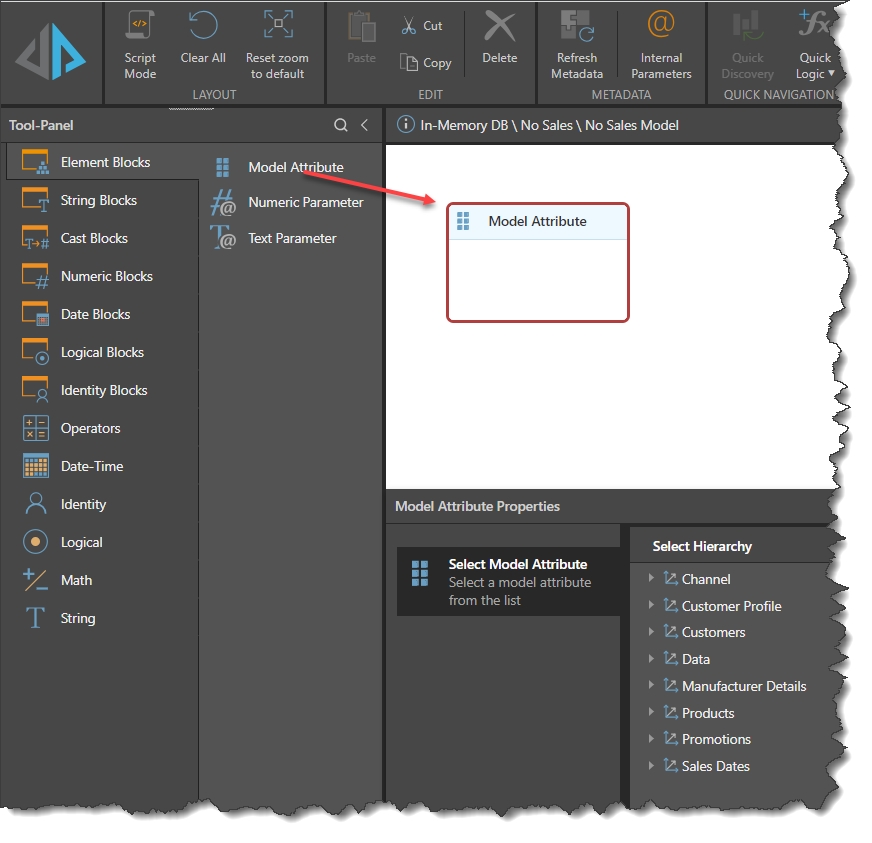
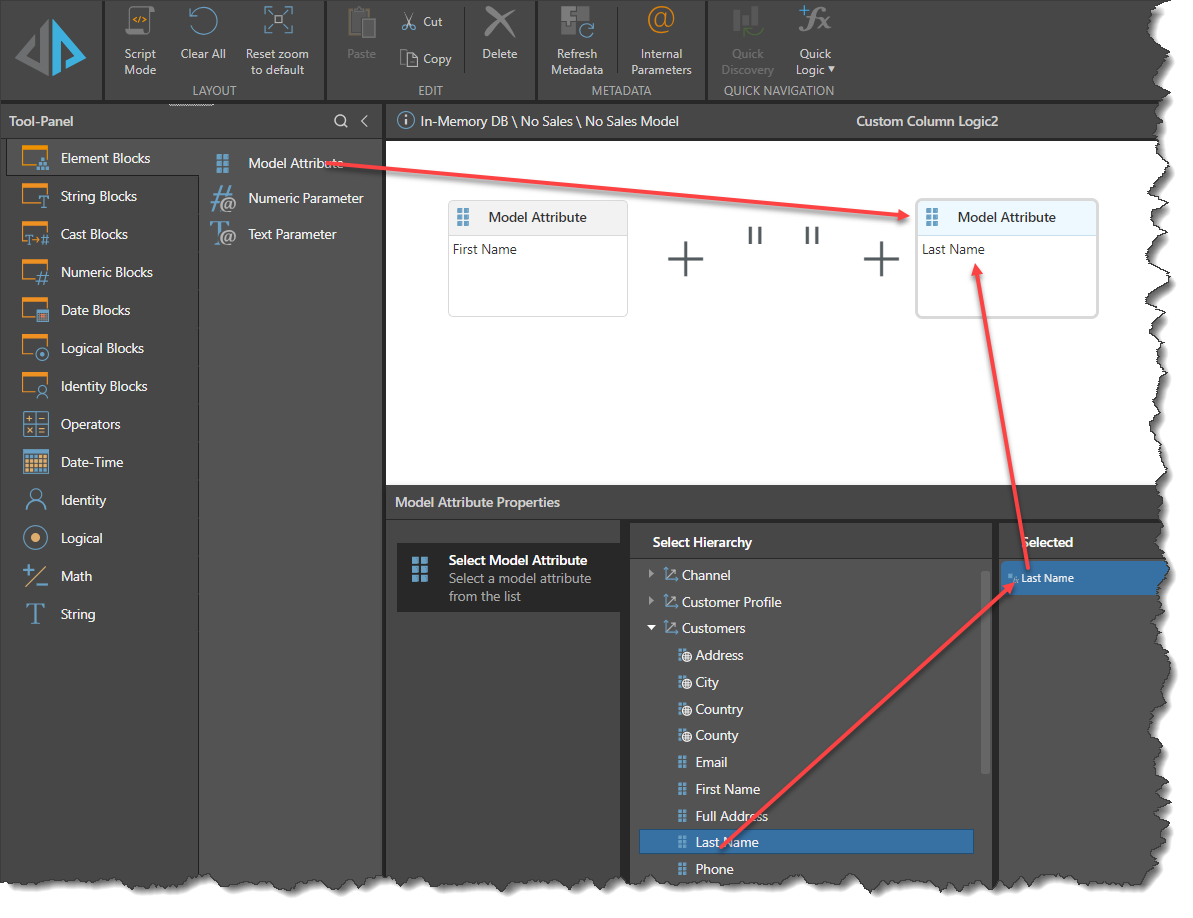
Drag a Model Attribute block onto the canvas:
Step 2
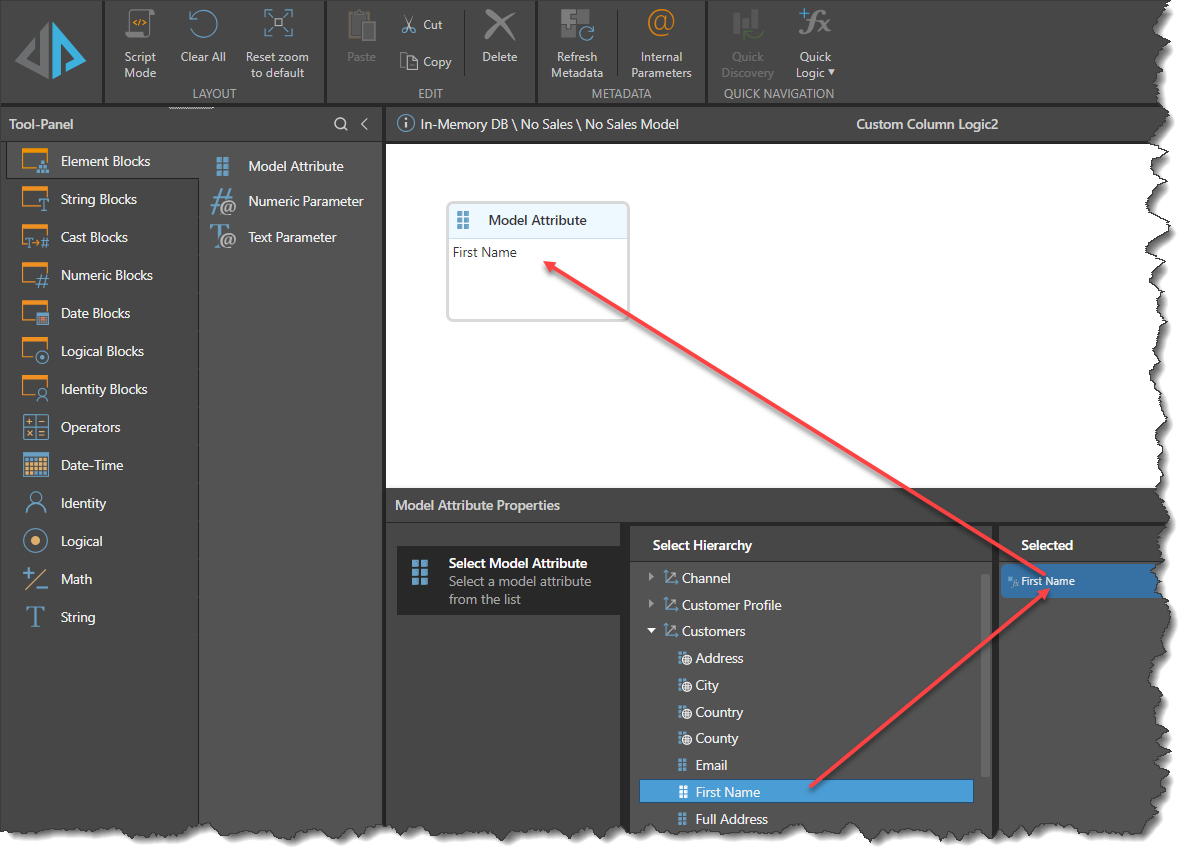
From the Model Attributes Properties Panel, choose the Attribute required by clicking on it. This will populate the block with the attribute details. In this case open the Customers dimension hierarchy and select [First Name].
Step 3
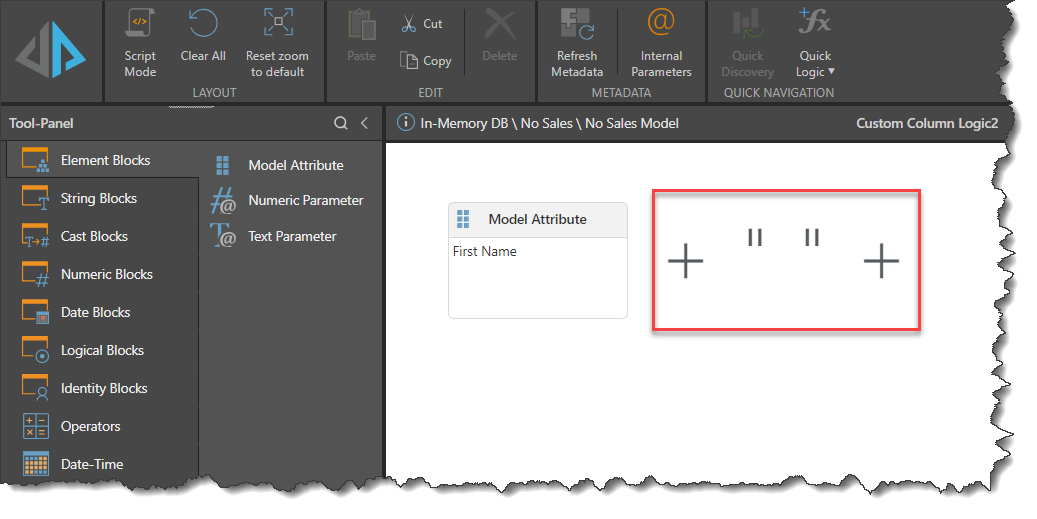
On the canvas, type the plus sign, double-quote, space, double-quote, plus sign:
Step 4
Drag in another Attribute block and set it to [Last Name] from the Attribute Properties Panel:
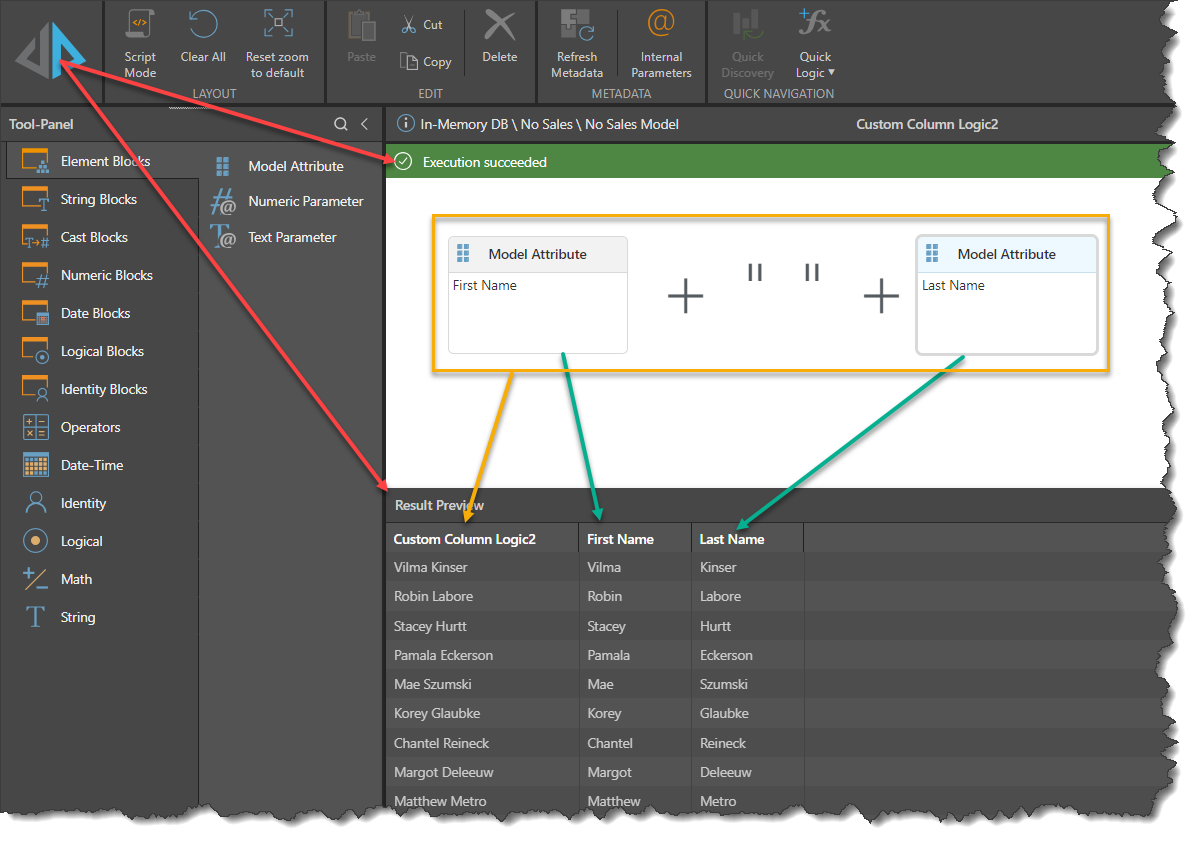
Step 5
Click the Pyramid icon at the top-left to preview the results:
Step 6
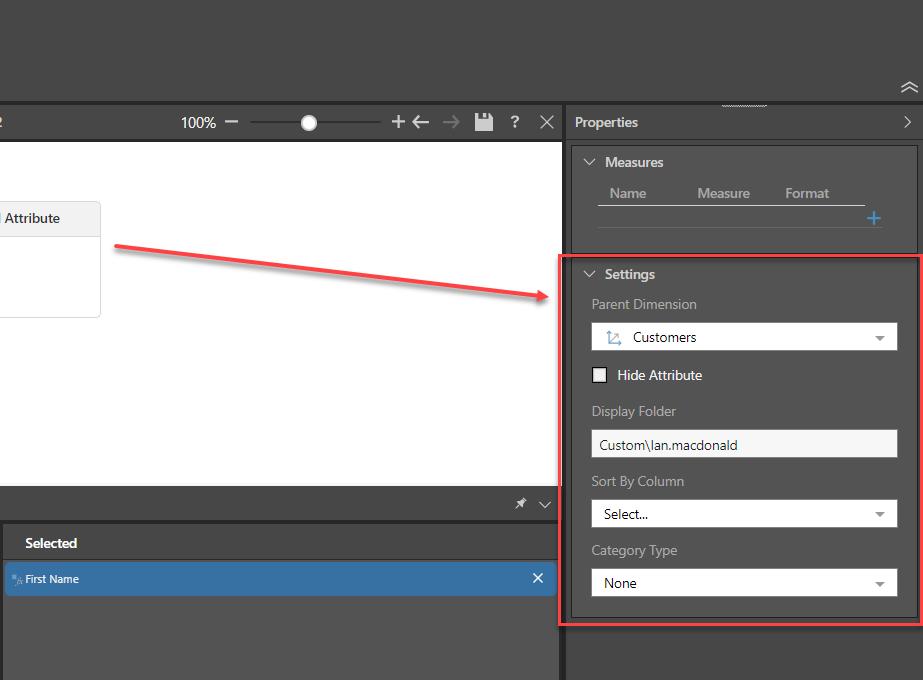
Set the values in the Settings Panel to reflect the requirements of the new attribute:
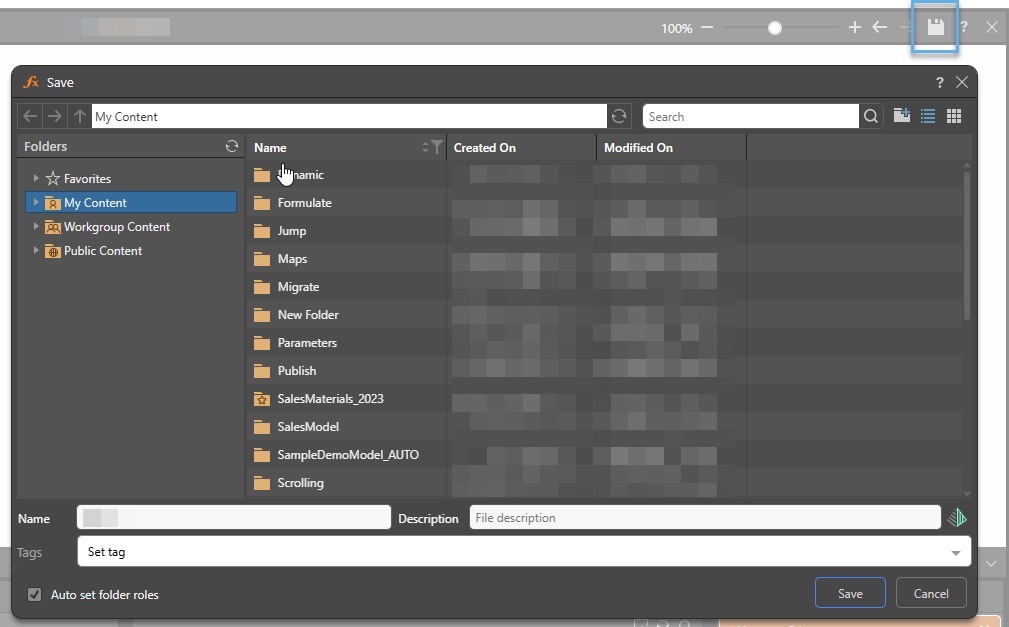
Step 7
Click Save to save into the target folder with the chosen name, [Full Name]:
Step 8
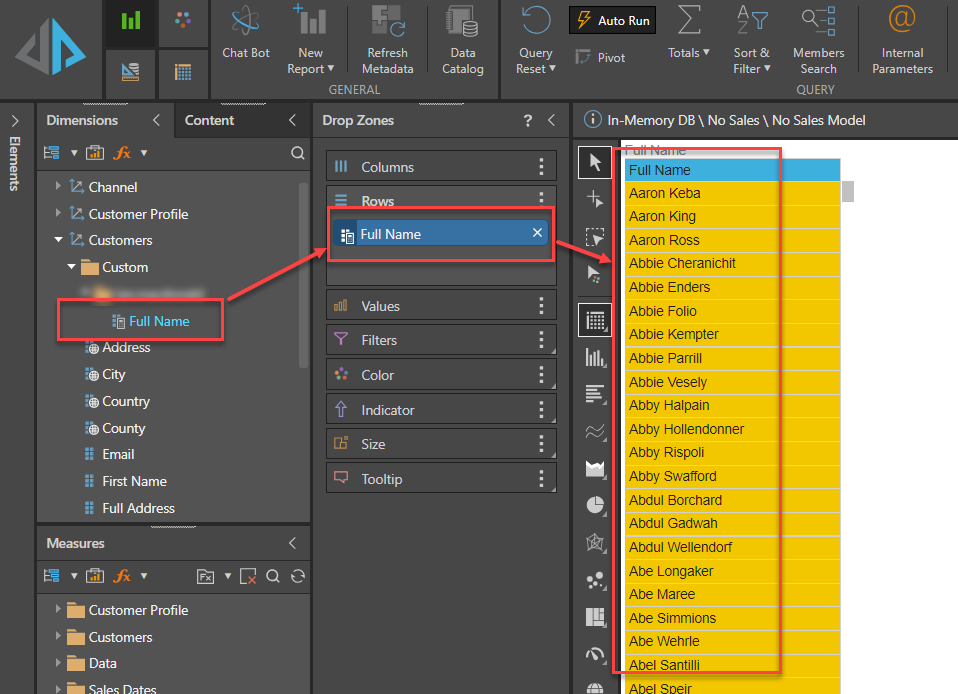
Click Quick Discover in the Ribbon to see the new Custom Column in a discover view. The new attribute will appear in the Custom Dimension table as defined in its Properties.